Polyurethane wood floor finish
Polyurethane wood floor finish, what is it? Having a general knowledge of polyurethane will help us understand how to properly apply it and the health and safety associated with it.
Polyurethane coatings are made up of these basic ingredients: solvents, dryers, leveling-agents and matting agents. Some may have additional ingredients to make it unique. The difference between manufacturer's are these unique ingredients. Which dictates the quality, dry-time, appearance and performance.
Polyurethane is not urethane. It is similar in some ways and differs in others. Polyurethane is made up of hard polymer resins enhanced with urethane.
- Polyurethane is stiff, hard, flexible and elastic.
- Urethane is flexible and elastic.
Always read and follow the manufacturer's instruction for application and recommendations for applicators. Read and follow their Safety Data Sheet (SDS) for handling, cleaning, disposal and storage of polyurethane floor finishes.
Characteristics of polyurethane wood floor finish
Polyurethane is a transparent oil-based varnish enhanced with urethane. It is durable, easy to apply, self-levels, has great great adhesions, and can be used for residential and commercial hardwood flooring.
- Chemical properties: Polyurethane floor finish contains natural oils such as linseed, tung oil or hybrids, which is a modified version(oil modified water base polyurethane). It contains dryers, matting agent, and film forming ingredients dissolved in mineral spirits and other solvents.
- Dries by evaporation
- Cures by oxidation
- Cures from top down, it will be dry to touch before it is fully harden
- Ambers in color and will continue to yellow as it ages
- Different sheen levels: Available from matte to high gloss sheen levels
- Odor - Polyurethane finish has a moderate smell that disputes as it cures
- Dry-time: it has a slow set-up time during application
- Dries to touch between 6-24 hours
- Dries to sand within 24 hours
- Completely cures from 14-30 days, some can take up to 60 days
Benefits of polyurethane wood floor finish
Why use polyurethane finishes? Here is a list of benefits of polyurethane wood floor finishes compared to other finishes.
- Durable - With quality resins, polyurethane is stiff and hard
- Flexible - Combined with urethane, the elasticity makes it exceptionally resistant to wear and tear
- Easy to apply - With ingredients for self-leveling, you don't need to over work the wood floor finish to get it smooth
- Resist heat - polyurethane is thermosetting, it doesn't melt upon heat contact
- Chemical resistant - It is exceptionally chemical resistant
- Water resistant - With the proper coverage, it will seal your wood floors and provide exceptional water and moisture resistant
- Easy to clean - Sweep and dry mop is all you need to care for this wood floor finish
How to apply a polyurethane wood floor finish
Whenever you are applying a polyurethane finish, be sure to read the manufacturer's instructions and specs on the side of the container, before beginning. Not all polyurethane wood floor finish are made equally. Manufacturer's uses different quality ingredients with different product lines. Always follow manufacturer's instruction for application and recommendations for applicators.
In this article, you will find useful, quality, hardwood flooring information on a step by step standard procedure on how to apply oil base polyurethane wood floor finish. I will explain how to prevent problems and give you advanced techniques to get professional results. Along with covering the basic techniques on applying polyurethane finishes.
Let's begin...
By now, you should have your hardwood floors sanded, prepped, cleaned and tacked following NWFA and manufacturer's guidelines. If, you have not done so yet, or need help with this task. Please refer back to our hardwood refinishing page before continuing with this part. This will ensure that you get the best possible result with your polyurethane wood floor finish. When you are ready, come back and continue with this part of the guide.
Always test a small area or produce a sample with scrap material, to ensure that you're getting the right color and result. Also, to see if, the polyurethane finish reacts in a bad manner with the surface being coated on - beading or bleed back.
Oil base polyurethane floor wood finish will have different working time. This is the amount of time or period you have available to apply the polyurethane finish before it starts to set-up - normally 10-15 minutes. Polyurethane Manufacturer's are constantly making improvements to their products. Also, EPA is always implementing new rules for changes on the flooring industries, from manufactures to floor mechanics. Which has an effect to the contents of their product. Techniques used 20-30 years ago may not work with today's polyurethane finishes. Knowing this is important if, you want to achieve a quality and well performing polyurethane wood floor finish. That will last you 15 to 20 years under proper care.
Oil base polyurethane wood floor finish
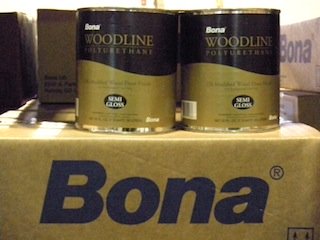 Oil base polyurethane floor finish
Oil base polyurethane wood floor finish is one of the easiest wood floor finishes to apply. The standard method for applying an oil base polyurethane wood floor finish is with a bristled brush and a lamb's wool applicator.
Use a lambs wool applicator and a China bristle brush that's specified for oil paints - only.
It is very important to use only oil paint applicator, to reduce puddling, to provide proper coverage, and to allow the oil based polyurethane wood floor finish to release itself from the applicator and level properly. This will prevent unwanted brush marks, flashing, ridges and lap marks in your polyurethane floor finish. Allow your oil base polyurethane finish to acclimate to room temperature, to make it easier to apply. This will also prevent bubbles and streaking from occurring.
Polyurethane wood floor finish Tip: Have a helper cut-in on the edges while, you coat the main body of your wood flooring with polyurethane, using a lamb's wool applicator. This will keep your edges wet longer, allowing your polyurethane finish to level off evenly throughout your hardwood floors, avoiding mismatches and flashing. You will also, spend less time breathing in the oil base polyurethane fumes.
Cutting-In The Edges With A China Brush
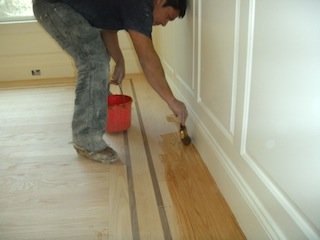 Cutting in with 4" china bristle brush
Brush applicator - Start by cutting in the edges with your brush. Using a 2 1/2", 3" or 4" wide, china bristle sash brush that releases finish quickly. Remove loose brush bristles before using. Using an applicator comb, or brush it across your hands back and forth, so the loose bristles flings out. Then vacuum the head of the brush to remove any loose hairs.
Carefully coat the floor and always keep moving, avoid getting any of the oil base polyurethane wood floor finish on any other surfaces. Otherwise, the oil base polyurethane finish will stain and yellow the surface. If, you accidentally do coat other surfaces other than your floors. Immediately, Use mineral spirit to clean it up.
When coating the edges, start by brushing across the grain, then complete your final brush pass with the grain. This is called chasing the grain.
Polyurethane wood floor finish tip: Use a Zig-Zag painting method. Cut in along the baseboards or wall, start by going left first, then reversing directions by brushing back, while creating a "Z" pattern, working the polyurethane away from the wall. Keep it to a maximum of 4 brush strokes, 8" wide x 4'-5' long, per section.
Remember to check for puddles, splashes and drips. Avoid brushing back and forth too many times. You will thin out the coverage and the polyurethane wood floor finish will tack up on you sooner. You will end up with unwanted brush marks, and ridges in your finish.
When applying a polyurethane finish, be sure to apply the proper coverage, so that the finish levels properly. If, you apply too thin of a coat. It can look dry and may not level properly, leaving unwanted brush marks and streaks. Too heavy of a coat, the finish can be too shiny (flashing) in that particular spot and puddles can occur. Plus, you can cause splashing with the brush while you are moving the finish around.
Maintain a wet edge at all time. By doing this you will avoid unwanted lap marks, ridges and flashing. Learn the basic brushing techniques, so you understand how to prevent and fix problems. Then you'll have a better understanding on how to use advanced techniques, that we will be explaining to you. But not until later, you must learn how to walk before you can run.
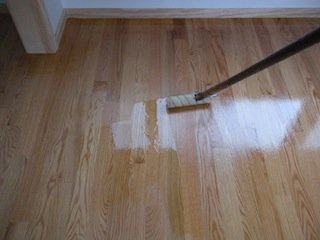
Applying Polyurethane Finish, Using A lambs Wool Applicator
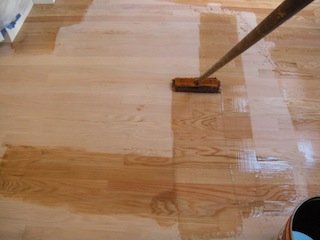 applying polyurethane using a block and lamb's wool applicator
Lamb's Wool applicator - use a light lambs wool applicator, with a thin nap. Remove any loose wool fiber from the applicator. Use a lint roller or tape to remove loose fibers, vacuum , then rinse with water or mineral spirit and allow to dry before using. Avoid pulling on the fibers, afterwards. This will create additional loose fibers.
Pour your oil base polyurethane wood floor finish into a 5 gallon pail. Attach the lamb's wool applicator to a mop handle. Submerge the applicator fully into the polyurethane.
Polyurethane wood floor finish tip: Always submerge your applicator to the same amount, same depth of polyurethane finish from the container. And coat the same amount of area, this will help you get an even coverage throughout your hardwood floors.
Start, from farthest point, away from your exit. Working in a 5'x 5' area or smaller. Apply a 12 inch x 5 foot puddle or line in the middle, in front of you. Pre-coat the wood-flooring, mopping from the starting puddle towards the "cut-in" edge. Use a Zig-Zag painting method, creating a "Z" pattern. As you are applying from right to left. Apply a slight downward pressure while your pushing away from you. Avoid applying pressure to the middle of the mop handle, this can cause the handle to break or crack. Overlap your brush passes to prevent any missed spots.
It's important that you pre-coat your floor, using one forward and back pass, to evenly distribute your wood floor finish. While, making sure the wood flooring is completely coated. This will help you apply an even amount of polyurethane wood floor finish across the surface, without thinning out your coverage of wood floor finish.
Note: It is not important to apply the finish with the grain of the flooring on the first coat - brush marks can always be buffed out. It is more important on the second and final coat, to prevent brush marks from appearing across the wood grain.
Tip: When dealing with cold or humid climate conditions. Maintain room temperatures around 65-80 degrees. If the polyurethane finish does not dry to touch overnight or within a 12-16hr period. Adjust the temperature higher, usually 85 degrees is more than enough. Any higher, you can end up with brush marks in your finish, due to rapid drying.
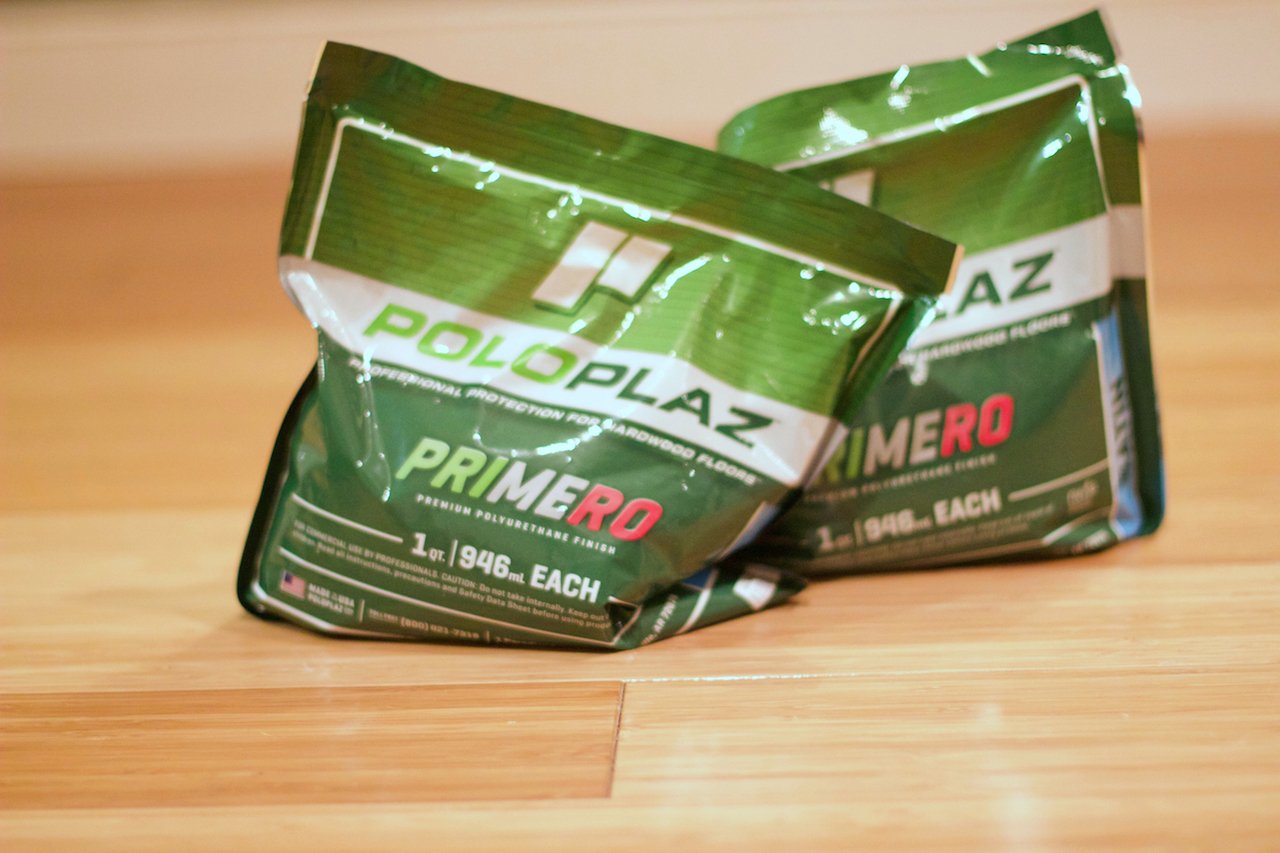 Oil base polyurethane
Once you have completed the pre-coat step. You want to do a light finish pass, using the same procedure, but with less pressure from the same start point. Making sure the area is completely coated.
On your finish pass, apply as very little amount of pressure towards the mop head. Allow the applicator to glide across the surface without adding or removing additional oil base polyurethane finish. While doing this check for splashes, unevenness, and missed spots, re-coat if, necessary.
Tip: If, there is too much friction or drag on the finish pass, apply more polyurethane.
Polyurethane wood floor finish tip: Minimize your passes to 2, this will prevent thinning and dry brushing in the polyurethane wood floor finish. Feather out the edges if necessary.
Repeat both processes for edging and lamb's wool applicator. Working towards the exit area. Open any windows as necessary to allow unwanted fumes out and proper ventilation, during the process of applying your polyurethane finish. Allow to dry overnight or to suggested manufacturer's direction. Before abrading and applying the next coat.
Polyurethane wood floor finish tip: Test the surface for dryness, by abrading an small area. Simply take a 220 grit sand paper and scuff up a small area. If, the polyurethane produces dust, it is dried. If, the sand paper clogs up, it is still too soft for intercept abrasion.
Sanding/Buffing In Between Coats
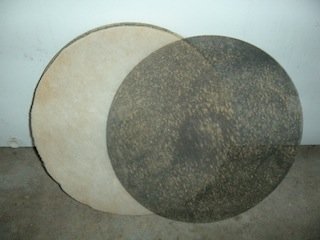 White buffing pad and 220 grit screen
In-between coat abrasion: Abrade your wood flooring using one of the following methods:
- a combination of white buffing pad, and new 180 or 220 grit screen
- A combination of white buffing pad, maroon pad with 220 grit sanding strip
- Sand dollars, 180 or 220 grit
- Multi-disc driver with 220 grit sandpaper
Buff, vacuum and tack the floor, then apply the next coat of polyurethane finish. Repeat this process until you've applied 2 to 3 coats of polyurethane wood floor finish. Do not buff the final polyurethane finish coat.
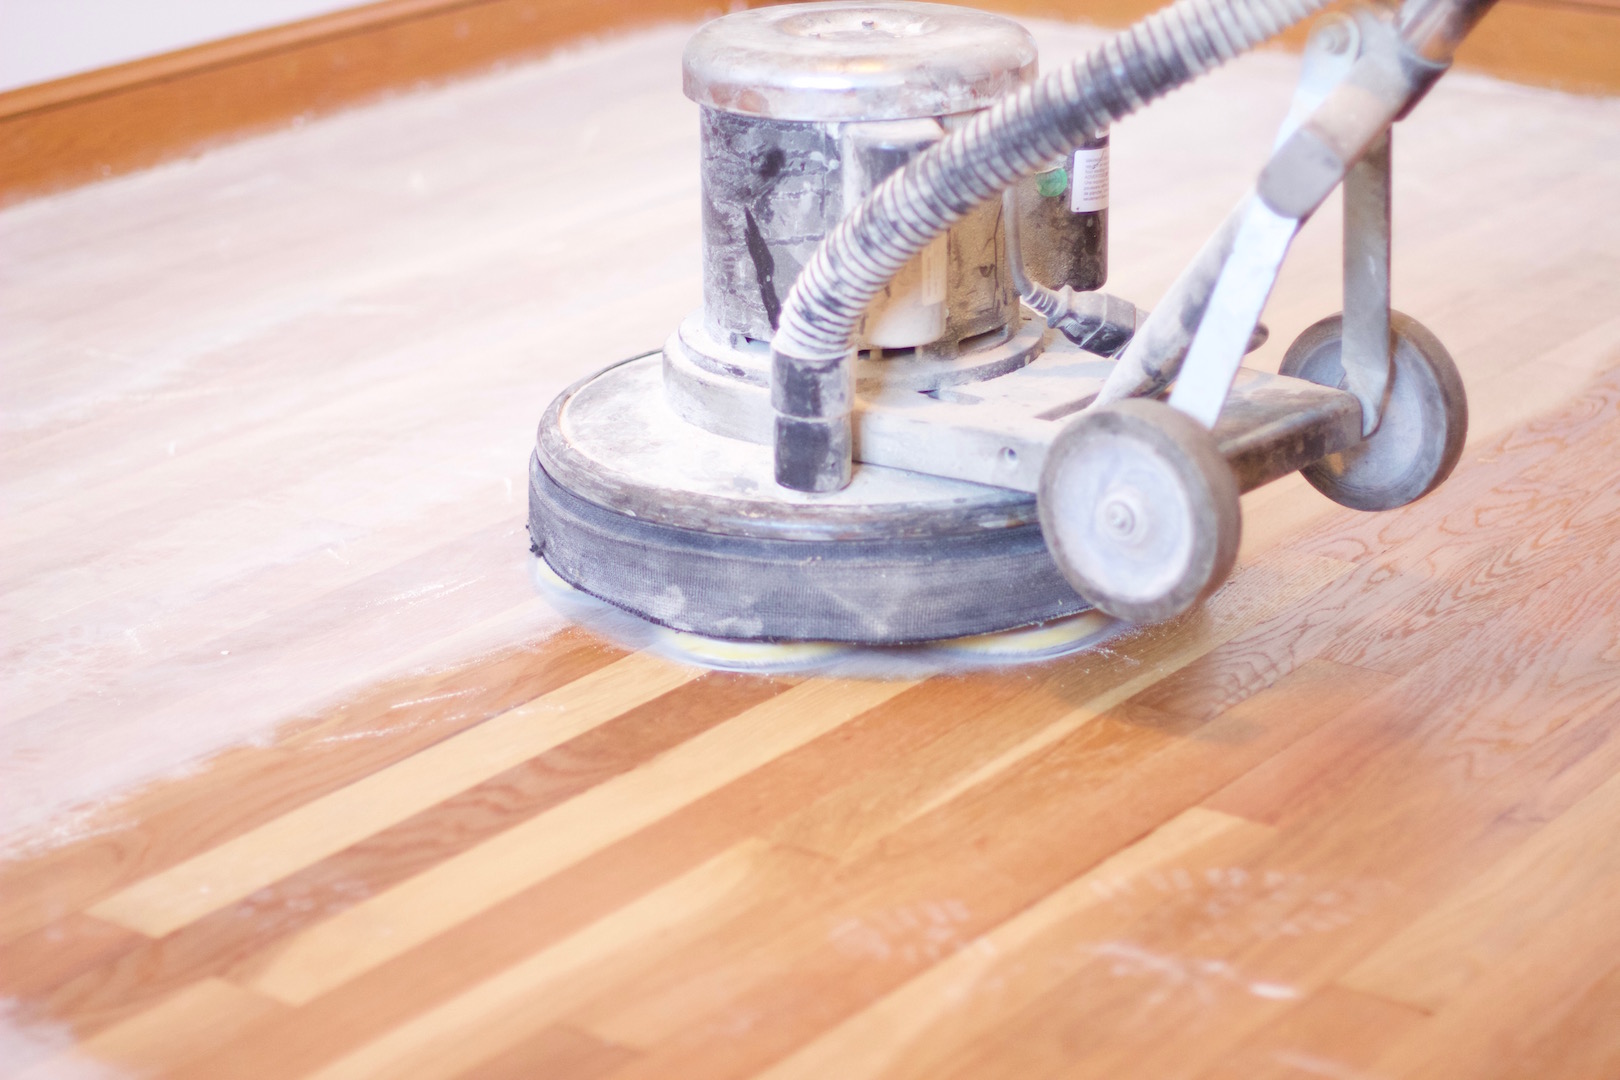 Intercoat abrasion with a multi-disc and 220 grit sandpaper
 Polyurethane wood floor finish tip: When you abrade your floors, make sure you buff out any dust, particles and bubbles, before cleaning and tacking. Otherwise, it will show through on your next coat. The finish should feel smooth and flat, no bumps.
Allow the final polyurethane finish coat to dry for 24 hours for light foot traffic. And 48-72 hours before moving any heavy furnitures in place. The polyurethane finish will take up to 30 days to fully cure or harden. Be cautious not to damage the floor, when using it during this period. Wait 30 days for your oil base polyurethane wood floor finish to acclimate to sunlight. Before laying any area rugs, to prevent unwanted tan lines.
 Oil base polyurethane floor finish
For additional information on how to care for your newly finished floors, visit our hardwood floor care page.
Wood Finish Polyurethane Varnish Tips - Drying Tip: Preheat your home to 72 degrees, then turn it down to 65 degrees 15 minutes before coating. The warm floor will allow your wood floor finishes to level off equally, the cool down will prevent early tacking. Avoid using any fans to blow air across the final coat. It can transfer dust particles, lint, fiber or hair onto the surface of your hardwood floors.
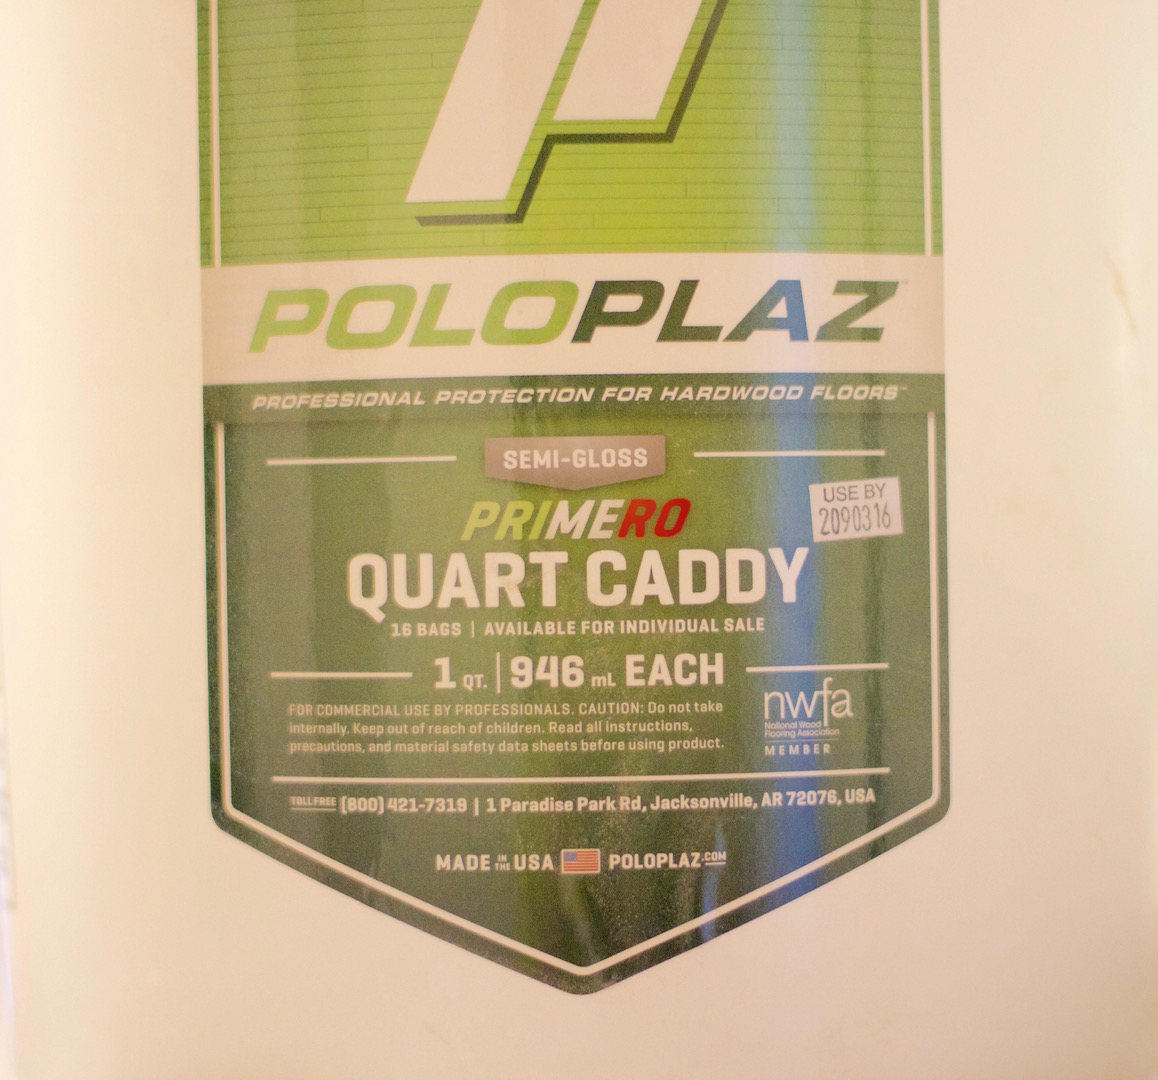
Oil based polyurethane wood floor finish is a traditional, durable, easy to apply quality finish with a very good reputation. When you're choosing an oil base polyurethane wood floor finishes splurge on a high quality polyurethane finish. This will save you money from having to refinish your wood floors to often. For, the best polyurethane wood finish use Poloplaz - Primero Polyurethane. It has excellent durability and superb leveling properties, makes it easy to roll. The floor finish will make your life easier.
Keeping a wet edge
Today, applying polyurethane floor finish is a little more tricky than what it use to be, compared to years back. With the new trends and VOC law being implemented into manufacturing the finish. It's changed the way we sand and prep for today's polyurethane finish. What use to be acceptable 20 to 30 years ago, is not acceptable today.
With Today's trends and wood floor finishes, polyurethane floor finish demands a high quality sanding to achieve the look desired today. Proper sanding and prepping is critical for the best looking and performing wood floor finish. Improper sanding can lead to improper film build and premature wear. Reducing the life of the polyurethane floor finish. Not only that sanding and prepping is critical. Using the correct applicator to achieve the proper coverage rate for the correct film build, recommended by manufacturer's.
But how?
Polyurethane finishes with short open time or has a thick viscosity. You have to do everything within one try, Avoid playing with the polyurethane wood floor finish. One back and forth brush stroke is the key to applying these polyurethane floor finishes. Any more than that, you'll thin out your wood finish. You can end up with brush marks, lap marks, flashing, bubbles or ridges. That's a list of problems you would like to avoid.
Here's how you can prevent these problems.
Stir your polyurethane, don't shake. Shaking will increase the chances of producing bubbles. Keep a wet edge, when you're coating, and try and minimize your brush strokes. If, you're brushing back and forth, too many times, then you're just playing with the polyurethane finish. Brushing it too many times will thin out your floor finish, This can cause flashing, lap marks, and introduce more bubbles.
The best brush method to use, when applying polyurethane floor finish is to use a Zig-Zag brush method for edging.
When cutting in on the edges with your wood floor finishes. Cut in, then brush out in a zig-zag motion. Draw a "Z", while brushing out and overlapping your passes, Snow plow the finish out towards you and brush the excess finish to the next area. When open time is short, coat the area with the least amount of brush strokes, if, possible. Fixing ridges, splashes, puddles, and touching up missed spots along the way.
When applying polyurethane floor finish with a lambs wool applicator. Coat the floor back and forth, from right to left, once only, creating a W - pattern. Whether it's left to right or right to left, continue the same direction, as you started. Using which ever method that's most comfortable to you. Feather out the edge as necessary.
Example: left to right, left to right, left to right, always continuing from the side you've started, plow the finish towards the opposite directions to keep the wet edge. Avoid changing start points. Some polyurethane finishes will flash and create lap marks.
Best way to apply polyurethane floor finish
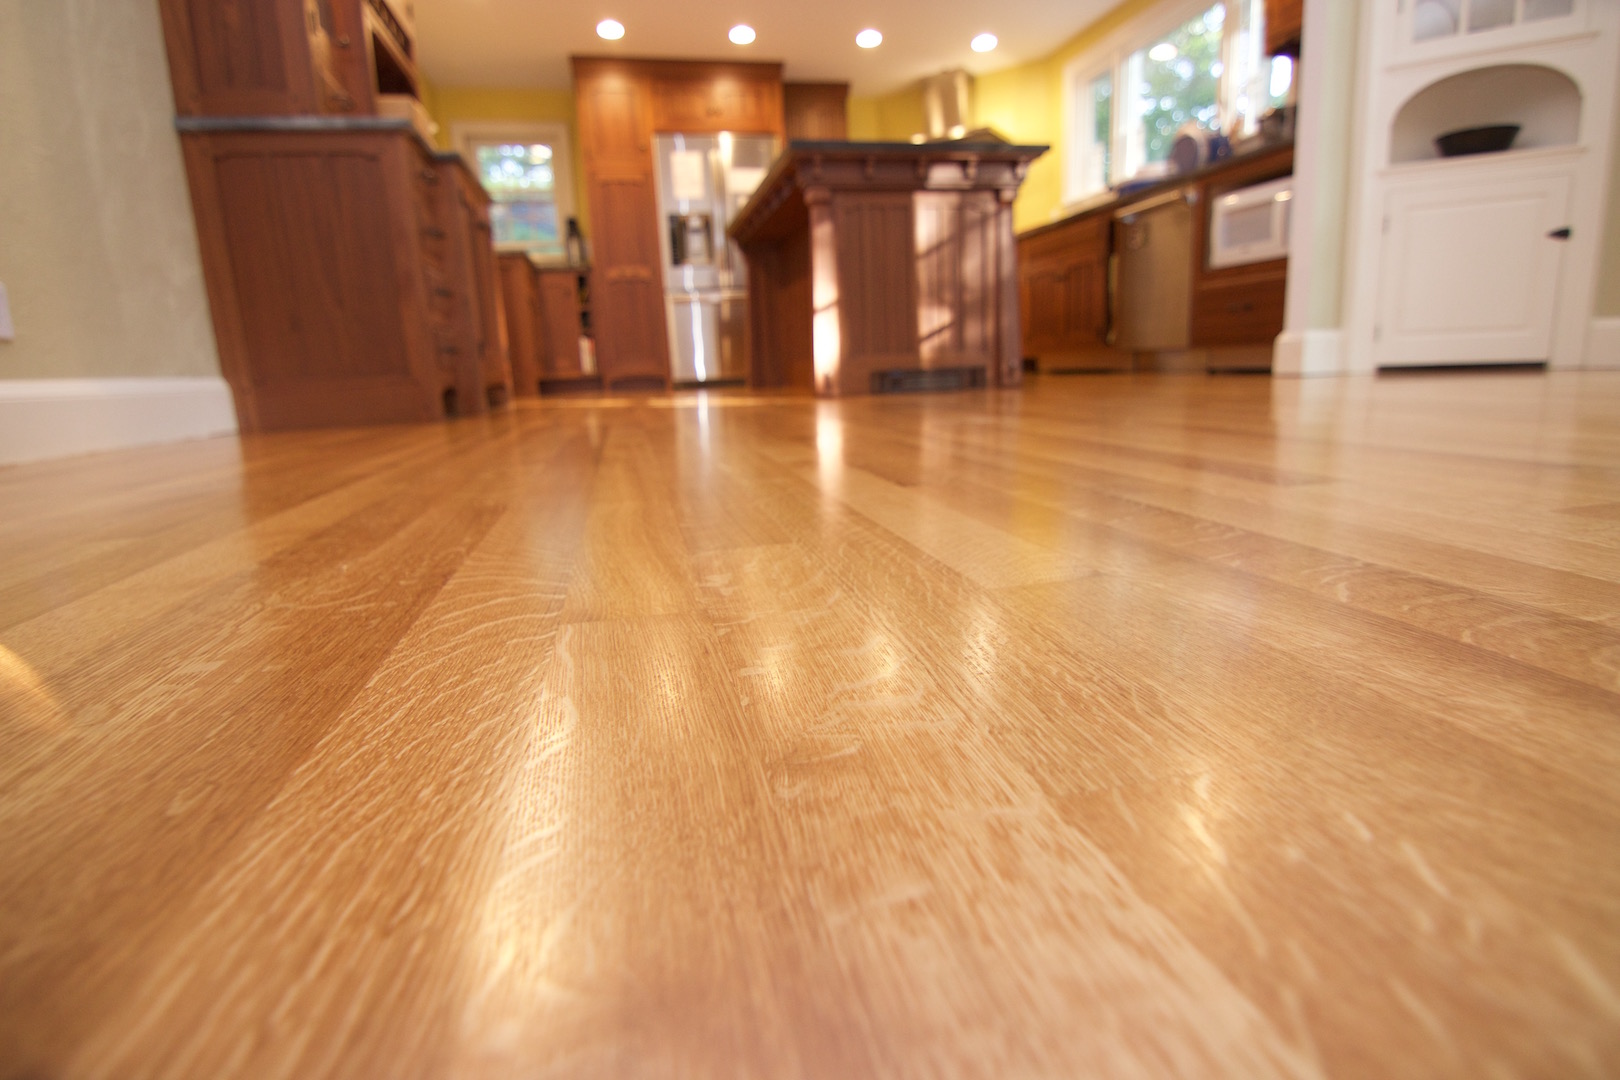 Oil base polyurethane finish applied with 120 micron microfiber roller
 The best way to apply polyurethane floor finish. If, you're looking for professional results, especially with a satin finish, this is a section that you can't skip out on.
We will be using a satin wood finish as an example. Brush marks, lap marks and flashing are most likely to occur with a low sheen more than any other sheen.
Whether it's the new 350 VOC, the old 450 VOC or a Moisture cure wood floor finish. These problems occur commonly throughout this particular sheen.
What's the best way to prevent these problems?
While we may understand what the problem may be. We must know what is the cause? The main cause of our problem is created from brushing back and forth. This causes our finish to thin out, and tack over too soon. Resulting in brush marks, lap marks and flashing.
We cannot brush over dried, semi-dried or tacky polyurethane without risking a chance of resulting to one of these common problems. It is possible to get a smooth, flawless finish with our standard lambs wool applicators, but there is an easier way.
What's the remedy to this problem?
We simply use a hardwood floor polyurethane roller. With this type of applicator, it's much easier to manage and deal with the thick viscosity and fast drying finishes. It prevents all the problems that is mention above.
A polyurethane floor roller is different from a paint roller. A Polyurethane floor roller is more balanced than a paint roller. This is due to the design of the roller. It helps prevent the roller from losing shape and skip rolling. It uses a handle that has a 3/8 steel rod that inserts in the polyurethane roller, for easy installation and removal.
It's a fool proof floor applicator, you don't have to be a professional or need 50 years of experience to master this flooring tool. Use the same basic technique as you would for painting a wall.
The polyurethane floor finish doesn't look as pretty, on your first pass, when you apply it. In fact, it looks like you'll end up with a textured orange peel look. But don't worry, use a quality polyurethane finish and apply a generous amount. The floor finish will level itself out, leaving you with a nice smooth gleaming finish. If, you end up with an orange peel look, then you applied too thin of a coat or you are using the incorrect type of roller.
Roller types to use:
- Mohair roller - blue and red candy striped rollers, available in 1/8", 1/4" and 3/8" nap.
- Microfiber roller - available in 80, 100 and 120 micron, can be used with oil base and water base polyurethane finishes.
For the best result, use a 3/8 nap, 120 micron microfiber roller. These rollers do not produce splashes or slings compared to mohair. Which allows you to roll faster. It reduces the need to feather out edges. The 120 micron eliminates the orange peel effect. You can roll any direction.
Why is a floor roller so effective?
 Applying polyurethane with a mohair roller
When applying polyurethane floor finish with a roller, we're not pushing our polyurethane finish around. A floor roller will plop the finish onto the floor, so we are not thinning it out or creating premature tack time. Eliminating a whole list of problems - brush marks, lap marks, flashing, drips, puddles, splashes, and ridges. This allows us to produce a heavy film build in the least amount of coats. Maximizing the life expectancy of our wood floor finish.
Use this method and you will end up with professional results, without having to hire a professional.
Here's the process for applying polyurethane wood floor finish with a polyurethane roller.
- Cut in the edge with a brush, using a Zig-Zag brushing method, plow out, keeping the edge wet.
- Roll over the edge, with your hardwood floor roller, to introduce the orange peel look.
- Fully submerge your roller in a 5 gallon polyurethane filled pail.
- Coating with the length of your floor boards. Roll out a "W", then start rolling from one side using a uni-directional coating method, zig-zag out to the opposite side.
- Roll a final pass to make sure that your floor is completely coated with polyurethane.
- When, your backed up into a wall, just roll perpendicular or across the grain, towards the exit.
And your done, It should've taken you no more than 15 minutes to coat a 200 sq. ft. area.
Polyurethane wood floor finish tips: Use 180 or 220 grit screen to sand in between coats. Wear down the screen with a piece of sandpaper before using it. This way it is not too aggressive and you will avoid heavy swirls.
Get to know your finish
Get to know your finish, so you can adjustments to your technique, when applying a polyurethane wood floor finish. This will help you achieve a smooth, quality polyurethane wood floor finish at the end.
Don't be afraid to experiment, anything broken can always be fixed.
Test out your polyurethane finish see how well it levels,
Brush across the grain on the first coat in a few areas, see how well, it levels after it dries. Some finishes will level itself, leaving no brush lines and stop marks. By splurging a little on high quality polyurethane. You will save a lot of time, because you don't have to brush with the grain. Or have to worry about trying to workout certain flaws. The wood floor finish will fix itself. Who doesn't like that!
Test out the set-up time See how fast your finish tacks up.
This will help determine your start and end point. You'll be able to avoid flashing, brush marks, stop marks, and lap marks. Room temperature and work condition will have an affect on set-up time. Determine whether you need to adjust temperature, air flow, add a finish retarder to slow down the set-up time or get extra help to apply the coating. When applying polyurethane floor finish, whenever possible, avoid adding a retarder or thinning your finish. Use as is for best performance.
Test out your Applicators Some applicators are D.O.A. (Dead On Arrival)
Don't rule out your applicators, when applying polyurethane floor finish. You can purchase the highest quality applicator. But even the best sometimes provide bad polyurethane applicators. If, you're left with a lot of loose fiber or brush hairs in your polyurethane floor finish. Toss them out and use new ones. You should not get any loose fibers, if you cleaned and prep your applicators properly. Use a lint roller or tape to remove loose fibers, vacuum the applicator and rinse with water or mineral spirits.
Test out the Sheen Is it the finish you want?
Semi-gloss from one manufacturer is different from another. If, you're matching a sheen, see how well your finish matches the existing one. If, you want a more exact match, tone it, by adding a satin wood finish to dull it or add a gloss wood finish to make it shinier. Make note of these things and make the proper adjustment.
Things to expect while applying polyurethane floor finish
Your polyurethane wood floor finish is not going to look perfect on the first coat. Don't lose ambition or be overwhelmed. As long as you have done everything you're suppose to, sanding and cleaning, you'll be fine.
Here are a few things to expect when applying polyurethane floor finish.
First Coat: Expect raised grains, rough surface, loose fibers, uneven sheen, uneven coating, flashing, brush marks, lap marks, and bubbles or trapped particles. These are common things to expect from first coat. Simply just give your polyurethane finish a good buffing with a new 180 or 220 grit screen. This will remove flaws such as brush marks, lap marks, bubbles, raised grain and any particles left on the polyurethane finish.
- Uneven sheen and coatings are simply fixed by stirring more and applying a more even second coat.
- For brush marks and lap marks, buff and apply a heavier coat and change the order or direction that you are brushing. Apply your polyurethane wood floor finish with the grain of the wood.
Second Coat: You should start to see a smoother finish, fewer to no bubbles, possible brush marks and lap marks, depending on the quality of the finish being used. Adjust room temperature to assist the finish to level. Continue to brush with the grain.
Use a new 180 or 220 grit screen to buff your polyurethane finish. This will remove all the flaws left behind. Give this coat a good cleaning and tacking, before applying polyurethane floor finish.
Polyurethane wood floor finish tip: The smoother you buff your hardwood floors, the smoother your finish will appear. Use a 220 grit and abrade the floor thoroughly. Clean well, vacuum and tack.
Third Coat: I call it the "The Money Coat", if this coat doesn't come out good, then, you're going start losing money. No flaws should appear on the finish coat. Any flaws can be touched up by spot buffing and coating, otherwise buff and re-coat entire area.
Before applying the final polyurethane wood floor finish coat, clean and tack very well. Tack with a dry microfiber mop, repeat if necessary.
Three tries to make it right, understand what your polyurethane finish is doing, make the necessary adjustment, when applying polyurethane floor finish, if needed.
You'll end up with professional quality results.
Oil based polyurethane wood floor finishes are a traditional, quality finish with a very good reputation. When you're choosing an oil base polyurethane wood floor finish, invest in a high quality polyurethane finish. This will save you money and time, from having to refinish your wood floors too often.
If, you have a more contemporary style, consider using a water based wood finish, for a more natural look.
Learn how to take care of your newly finished polyurethane wood floor finish.
Choose an ideal company
You have done all the research and now have the knowledge. Don't choose the wrong flooring company.
Why work with average, when you can work with an ideal hardwood flooring company? Avoid opting for sub-par products, poor workmanship, the lack of industry knowledge and training for the sake of something new.
With G & S Floors, you will experience optimum personal service, with superlative, effective premium quality workmanship in the industry and high quality products. Homes are one of the biggest and most important investments and should be cared by an ideal company.
We've been in business over 19 years. We are a NWFA flooring contractor and follow industry standards and best practice for hardwood flooring installation, sand and finishing. We have access to training and ongoing professional development. We have a well trained staff and we never stop learning. We have a powerful network of talented professionals, distributors, manufactures and experts.
Invest in "Quality" for better service and hardwood flooring that can last a lifetime or centuries!

