Hardwood Floor Sealer
Whenever you're applying hardwood floor sealer, be sure to read the manufacturer's instruction, and specs, along with their safety data sheet for proper handling. Not, all finishes are made equally. Always test a small area, to ensure that you're getting the right color and to see if the finish reacts in a bad manner with the surface being coated on.
What you should know, before buying a hardwood sealer
 Water base floor sealer
There are four types of hardwood sealers to choose from oil modified, water base, de-waxed shellac and stain sealers.
They all do the same thing, penetrate into the wood and seal the wood pores, for a better and smoother build up on your top coat. Certain types will prevent side bonding and panelization, where others don't. Side bonding is when the flooring boards are glued together at the joints by the finish. And panelization is when all your floor boards are joined together to form a large panel. You probably don't think that it sounds so bad.
Let me explain, we all know that wood needs to, expand and contract. When they don't, well, something has to give - somewhere and somehow.
Side bonding - When is side bonding an issue? Side bonding is an issue when your flooring boards need to contract and shrink. You're probably thinking, that you prefer a tight floor at all times anyways. So, side bonding is ok, with you. Myself, I'm the same. I don't like to see food crumbs and dirt get trapped in gaps. Cleaning becomes a project, meaning - less sports television time, ugh!
Panelization - What about panelization? Your flooring boards turn into one large single panel. It looks that way anyhow. So, what is the big deal?
When you combine both issues, side bonding and panelization. You now, have a big issue. The larger your flooring space and the wider your flooring boards are, the bigger the issue.
What is it?
We've seen these types of floors before. A section of floor in our home, that has no gaps, then all of a sudden. You find a 1/4"-1/2" gap or crack in a flooring board. That just showed up, when you know, it was never there before. Well, it's the result of side bonding and panelization. Your flooring boards glued at the sides, formed a large panel. And when it contracted, the weakest point had to give. This is the result of a poor quality finish, that did not prevent the problems.
How do we prevent these issues? With the use of a hardwood floor sealer. But once again, not all sealers will prevent side bonding and panelization.
Choosing A Hardwood Floor Sealer
- Oil modified sealers: Are similar to oil base top coats, only thinner. Which helps it penetrate and dry faster. Dry time is usually a couple of hours. This product is combustible, has a slight amber and cleans up easily with thinner.
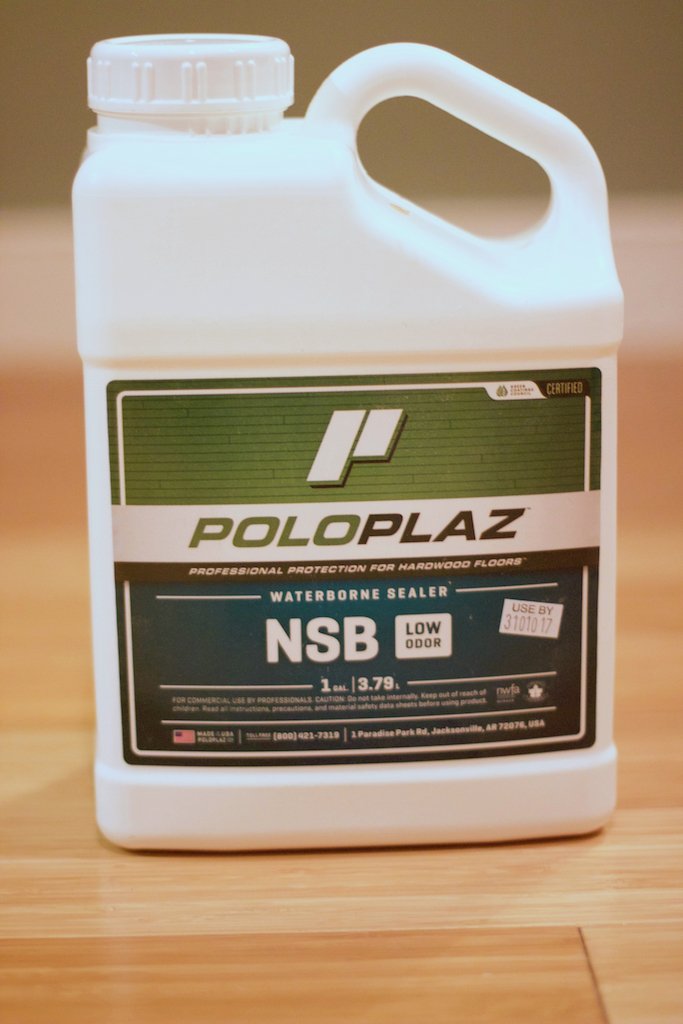
- Water based hardwood floor sealer: non flammable, low odor, prevents panelization, promotes topcoat adhesion and film build up.Cleans up with water. Will raise wood grain excessively, so you'll have to give the floor a good screening. Uneven coating will cause tanning pull, Tip: Apply a generous coat. For use with water based polyurethane, only. Certain brands, will cause side bonding and panelization, due to the low viscosity.
- De-waxed Shellac - Universal wood sealers: alcohol base = flammable, mild fumes, can be used with both water based and oil based polyurethane. De-waxed shellac contains no wax, unlike the regular shellac. Wax will cause an adhesion issue.
- Stain sealer: Some stains can be used as sealers. Check with the manufacturer for compatibility with other finishes. Can cause peeling if, not compatible with top coats. Abrading with a maroon pad, using a sanding pole is needed, if, drying exceeds 48 hours.
Hardwood Floor Sealer Tips
- Measure the moisture content and record reading before application. After the sealer has dried, measure the moisture content to make sure it returned back to original reading prior to start. To confirm that the wood floor is dry.
- Oil modified Quick dry poly sealer, apply a thin coat, and coat the same direction as the wood grain, using a synthetic lambswool applicator.
- Water based sealers, Use a high quality wood sealer and apply a generous coat. This will prevent tannin pull and allow the maximum film build up. And prevent side bonding and panelizaton. Water base sealers are fairly thin and it is easy to buff right through this stuff. If, there is no inter-abrasion required the manufacturer. It's best to wait to abrade the floor after the first coat of top coat.
- Sealing wood stains, For oil based polyurethane, seal the stain with polyurethane. For water base polyurethane, use water base sealer or a single component water base polyurethane to seal in wood stain.
- Need to match a floor color, you can tint water base sealers and lacquer sealers with aniline wood dyes, to make a one step wood toner finish.
Note: For Massachusetts residents, Alcohol base sanding lacquer and lacquer sealer sales and uses have been banned in the state of Massachusetts. Visit this link to learn more, Massachusetts ban on hardwood floor sealer.
Check your building fire codes for the allowance on the use of solvent based finishes.
Applying Wood Sealers
 Oil-modified quick dry sealer
Wood Sealers are one of the easiest wood floor finishes to apply. Use a synthetic lambs wool applicator and a brush that's specified for oil paints only - quick release.
It's important to use only oil paint applicator, to reduce puddling, to provide proper coverage, and to allow the wood floor sealer to level itself properly. This will reduce unwanted brush marks, if, you do get brush marks no worries. The polyurethane finish will cover and even it out.
Tip: Have a helper coat the edges while you coat the main body of the wood flooring. This will result in less time spent with inhaling in the wood sealer fumes.
Brush applicator - Start by cutting in the edges, with your brush, use a 3" or 4" brush, remove loose brush bristles before using. Carefully, coat the floor, avoid getting any hardwood floor sealer on other surfaces. If, you accidentally do, you can use mineral spirit to clean it up. When, coating the edges, you should brush across the grain, then complete your final brush strokes with the grain. Remember to check for puddles, splashes, or drips. When applying natural wood sealers, be sure to apply the proper coverage, so that the finish seals all the wood pores.
Be sure to maintain a wet edge at all time. By doing this you'll avoid unwanted lap marks.
Mop applicator - use a light lambs wool applicator. Remove any loose wool from the applicator, you can use a vacuum to do this. Avoid pulling on the wool, this can create more loose fiber.
Pour your Wood Sealer into a 5 gallon pail. Attach the applicator to a mop handle. Soak the applicator with wood sealer. Start from furthest away from exit. Working in a 7'x 7' area or smaller, apply a 12 inch x 5 foot puddle in front of you. Pre-coat the wood-flooring, mopping from the starting puddle to the coated edge. Apply downward pressure while your mopping. Avoid applying pressure to the middle of the mop handle, this can cause it to break. Overlap your passes.
It's important that you pre-coat your floor, using one forward and back pass. While, making sure the wood flooring is completely coated. This will help you put an even quantity of floor finish across the surface.
Warning, keep away from open flames
Tip: If dealing with cold climate conditions. Maintain room temperature at 65 degrees. If the hardwood floor sealer does not dry to touch within a 1-2 hr period or overnight. Adjust the temperature higher, usually 70-72 degrees is more than enough.
Once you've completed the pre-coat step. You want to do a light finish pass, using the same procedure, but with less pressure to equalize the finish. Apply pressure to the mop head to squeeze out the hardwood floor sealer. On your final pass, you must apply less to zero pressure towards the mop head. Allow the applicator to float across the surface. While doing this check, for splashes, unevenness, and missed spots, coat if necessary.
Repeat both processes for edging and mop applicator. Work towards the exit area. Open any windows necessary to allow unwanted fumes out, during the process of applying your hardwood floor sealer, allow the wood sealer to dry 1-2 hr or overnight.
Apply a coat of natural wood sealer to help protect your wood floor. When you're choosing a hardwood floor sealer, invest in a high quality finish. This will save you money, from having to refinish your wood floors to often.
Did you find the article helpful? Don't forget to click "like and share" button. So, we can bring more helpful content.
Choose an ideal company
You have done all the research and now have the knowledge. Don't choose the wrong flooring company.
Why work with average, when you can work with an ideal hardwood flooring company? Avoid opting for sub-par products, poor workmanship, the lack of industry knowledge and training for the sake of something new.
With G & S Floors, you will experience optimum personal service, with superlative, effective premium quality workmanship in the industry and high quality products. Homes are one of the biggest and most important investments and should be cared by an ideal company.
We've been in business over 19 years. We are a NWFA flooring contractor and follow industry standards and best practice for hardwood flooring installation, sand and finishing. We have access to training and ongoing professional development. We have a well trained staff and we never stop learning. We have a powerful network of talented professionals, distributors, manufactures and experts.
Invest in "Quality" for better service and hardwood flooring that can last a lifetime or centuries!

