Hardwood Floor preparation
Hardwood Floor preparation - how to. How is a subfloor prepared for installation? How are hardwood floors prepared for installation? How are hardwood floors prepared for refinishing or finishing? How are finishes prepared? How are applicators prepared? All these questions and more, keep reading to find out answers on what preparation is needed for a successful installation and refinishing.
Hardwood Floor preparation for installation
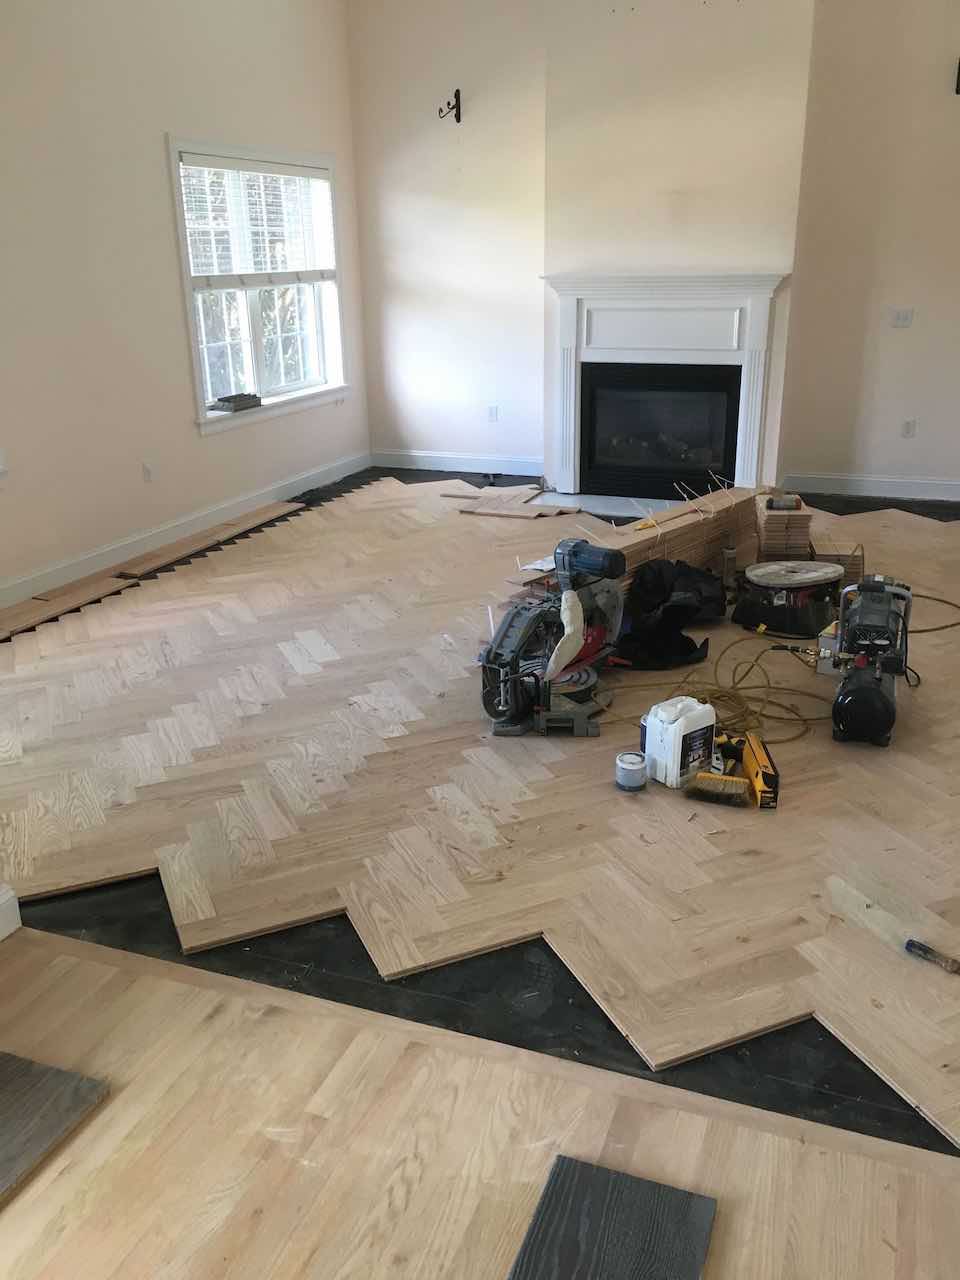
 With the proper hardwood floor preparation. We were able to keep this herringbone patter tight , square and straight. Making it an easy installation with quality results
Properly preparing your subfloor and hardwood floor will provide ease of installation and a properly performing floor. Increasing the longevity of the life of your hardwood floors. Not doing so will increase the risk of injury and an underperforming floor that can be short-lived with frequent refinishing or floor replacement. Follow the list below to properly prepare subfloor and hardwood for installation.
Subfloor preparation
- Humidity reading - indoor relative humidity should be between 30-50%. It should be maintained 1 week before, during and after the flooring is installed. Failing to do so will result in unwanted gaps or white lines in a dark stained floor.
- Moisture reading - Subfloor moisture reading should be measured in several areas in the room. At corners, in front of windows and doors, and in the middle of the room. Readings should be made at 1/4" depth and 3/4" depth and recorded. Readings should be consistent throughout. Subfloor moisture content should not exceed 12%. A high moisture subfloor will cause your floor boards to expand. When it dries or reaches equilibrium, you will end up with unwanted gaps.
- Clean - Clean your subfloor surface. Dirt and debris should be removed by sweeping and vacuuming.
- Check for flatness - Subfloor flatness needs to be 3/16" over 10' diameter. This is a national standard installation code and is what most manufacturers recommend. High spots should sanded or grounded. Low spots should be repaired by filling with skim coat compound.
- Set the nails and screws - Hammer down any protruding nails and set screw heads below the subfloor surface. The subfloor needs to be sound and solid. Any major deflection should be repaired.
- Repair damage boards and panels - Replace any area that is not firm or feels solid. The subfloor will not support your hardwood floors or any furnishings that will be placed on top. Large gapping holes should be closed up. Wet subfloors should be removed and replaced.
- Check for leaks - Check for any signs of water. Any signs of water means trouble. Do not install over a wet subfloor. Your floor boards will cup and expand. You will have crushed joints resulting in permanent gapping.
Hardwood Floor preparation
- Humidity reading - indoor relative humidity should be between 30-50%. It should be maintained 1 week before, during and after the flooring is installed. Failing to do so will result in unwanted gaps or white lines in a dark stained floor.
- Moisture reading - Several readings should be made to your hardwood floor boards. Top, bottom, ends and middle. Readings should be recorded.
- Acclimation - Acclimate the wood floor boards until it reaches equilibrium. Flooring strips should be within 4% of subfloor. Planks should be within 2% of subfloor. Failing to do so can and will result in excessive shrinkage or expansion. Leaving you with unwanted gaps or a damaged cupped floor.
- Stacking the bundles - Stack unfinished hardwood floor bundles with spaces in-between them, top, bottom and side to side. This allows air to flow on all sides. For Pre-finished flooring, follow the manufacturers guidelines for proper acclimation.
Hardwood Floor preparation for refinishing
 Properly preparing your surface will always yield good results at the end.
Hardwood Floor preparation for sanding and refinishing is more than just sweep and vacuum. There are several things that need to be done to get the perfect surface. If, you want to avoid chatters and waves, continue on reading for more information.
Unfinished Flooring
- Set nails - Set any nails that are protruding up. You can then fill it with wood putty to hide it. This will also, not cause your sandpaper to wear prematurely. And it will prevent any sparks that can ignite a fire.
- Double check for loose boards - Even on a newly installed floors, it is possible to run out of fasteners and forgetting to reload.
- Fill nail holes and gaps - Fill your nail holes and gaps prior to your final pass on the drum and edger for a more finished look. Do not apply filler prior to roughing your wooden floors. The deep cut can remove a lot of your wood putty.
- Clean - Sweep and vacuum prior to sanding.
Previously finished hardwood floors
- Remove nails and staples - Remove nails and staples leftover from carpet covered floors. Your sandpaper does not need the extra wear. Use nippers or tack pulling tool to remove staples and nails.
- Clean - Sweep and vacuum dirt and debris.
- Set nails - Set any protruding nails before sanding the floor to avoid grooves in your sand paper. Which will show up as unwanted lines on your floors
- Fasten any loose boards - Fasten down any loose boards. Loose boards can cause chattering and waves in your sanding. Also, loose boards causes annoying squeaks.
- Repair - Repair any damaged floor boards.
- Bleach - Bleach out unwanted stains prior to your final grit. Use the correct type of bleach for the stain. Oxalic acid for rust and water stain, laundry bleach for dyes, two part bleach for dark spots. For urine stains, the board should be replaced.
- Fill gaps - This depends on the region you are located in. For regions with humid summers and dry winters. I do not recommend filling gaps. They often fall back out between the seasons with the excessive shrinking and expanding.
There are a lot of botched hardwood floor installation and refinishing jobs out there. And there are plenty of horror stories from homeowners, throughout the web, due to improper hardwood floor preparation. Make your story a success story and set an example for everyone else to follow, by following the list of information from above.
For more information on hardwood floor preparation visit NWFA.org
Choose an ideal company
You have done all the research and now have the knowledge. Don't choose the wrong flooring company.
Why work with average, when you can work with an ideal hardwood flooring company? Avoid opting for sub-par products, poor workmanship, the lack of industry knowledge and training for the sake of something new.
With G & S Floors, you will experience optimum personal service, with superlative, effective premium quality workmanship in the industry and high quality products. Homes are one of the biggest and most important investments and should be cared by an ideal company.
We've been in business over 19 years. We are a NWFA flooring contractor and follow industry standards and best practice for hardwood flooring installation, sand and finishing. We have access to training and ongoing professional development. We have a well trained staff and we never stop learning. We have a powerful network of talented professionals, distributors, manufactures and experts.
Invest in "Quality" for better service and hardwood flooring that can last a lifetime or centuries!

