Custom Hardwood Floors
Custom hardwood floors, what is custom about hardwood floors? What is considered
custom?
Is it a border? No, anyone can purchase borders, premade designs and just install
them - easy.
Is it a medallion? No, these are made on a cnc machine, again, anyone can purchase
these same designs and install them - easy.
Mix materials? ehhh, still can be duplicated by anyone - still easy.
Although, many will consider these above designs custom. They can be easily duplicated,
therefore it wouldn't be custom. Simply, because it wouldn't be unique or one of a
kind.
The point of having a custom made hardwood floors, is so no else, will have the same wood
flooring as you. Because they're unique and one of a kind, that's bragging rights for
anyone who owns a custom hardwood floor.
So, what is custom hardwood floors?
Well, if you can find a rare wood specie that no one can get their hands on, and have wood flooring made, that's a custom hardwood floor.
If, you can have some insane border design custom made, like your name in five different wood specie with diamond inserts. Yeah, that's custom hardwood floors.
And how about a medallion, that has your own image in five different wood species, with some bling. You would probably like that.
I think your starting to get the picture of what custom made hardwood floors are. It's something no else will have, not because they can't afford it. But rather they won't think of it.
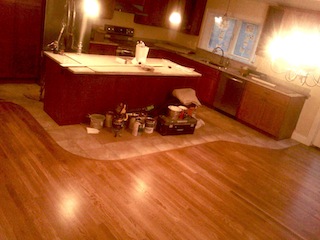
In this article, I will explain how to design, layout and construct a custom curved hardwood border, Along with pictures of custom hardwood floors from our project. If, you want any of the above ideas, you'll have to send it out to a CnC shop, so they can put it on a Cad/Cam system. Too much for me to cover here, how to use Cad/Cam, setting up and operating Cnc's, so back to the article.
So, Let's begin...
Flooring Tool List
- Miter Saw
- Table Saw
- Jig Saw
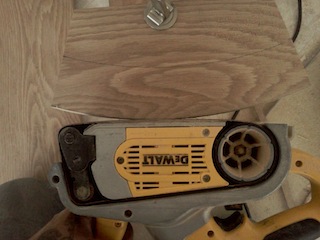
- Belt Sander with 80 grit belt
- Finish nailer and compressor
- Orange Builders string or anything to layout shape of curve
- Material to make jig for arc, this can cardboard cut to 3"x40" strips, 3"x40"luan strips, or plywood.
- Pencil
- Chalkline
- Quick clamps
- Framing Square
- Tape Measure
- Finish nails
- 6 foot level or straight edge
- Flooring material
- 3/4"x8" sq. stock (be sure that this material matches your flooring material)
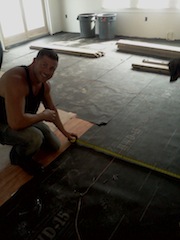
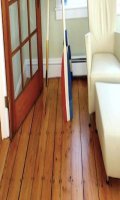
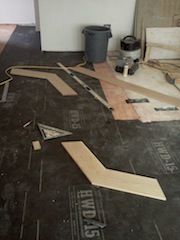
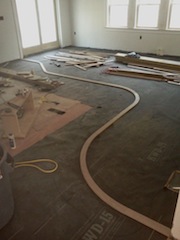
In this photo, Mark from BB Unique Remodeling is here to finalize size and location of the custom hardwood floor curved border. We had to put in consideration of cabinets and furniture locations, so do the same when your laying out your custom made hardwood floors design.
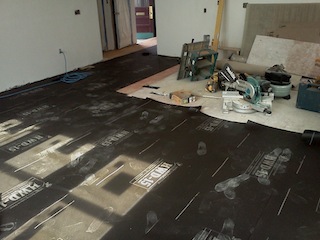
Once you have your locations figured out, use the builders string to layout your curves. Move and adjust the strings as needed, until you get a layout that is visually comfortable to you.
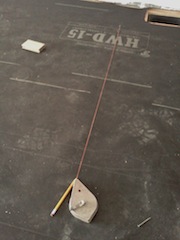
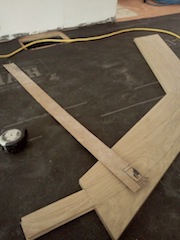
Once, you have your lines in place, it's time to find the center points for your arcs. Using a tape measure, measure from the end point of the arc to the center, to get your radius value, be sure to measure from both end points.
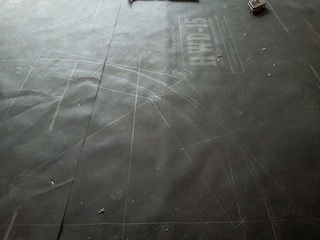
Round off your measurement to the nearest inch or feet. Keep your numbers simple, use measurements at 1, 1 1/2, 2, 2 1/2, 3, 3 1/2 ft. etc.
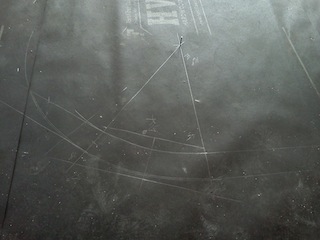
This will help you with your addition and subtraction, keeping them simpler to figure out. Once you have a radius value, using the framing sq. measure from the end point to the center, measure from both endpoints. The intersecting point is your center point for your radius, place a nail here. Draw and arc using your chalkline anchored to the nail, make a rough drawing of the arc.
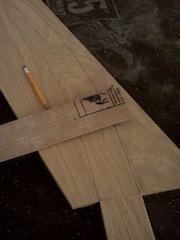
If, you want this to be 2 segment or 2 piece, then divide 90/2 = 45 degree, you'll need cut 2 pieces, with side angles at 22 1/2 degrees. For a 3 segmented arc or 3 pieces, it would be 90/3 = 30 degrees, you'll need to cut 3 pieces with side angles at 15 degrees. The number of segment or pieces needed will be determined by the width of your border, stock size, and size of arc.
On our project we decided on a 2 piece arc, so our angle was 45 degrees with 22 1/2 degree per side.
Start by drawing a line from midpoint(Id -inside diameter) to midpoint(Od - outside diameter) on your arc. Extend the line pass the Od by 1/2", using a framing sq., draw a perpendicular line, the width of the arc. Offset the line, to the endpoint of the Id of the arc, add and additional 1/2". You now, have a Length and Width dimension, for your segment of your arc.
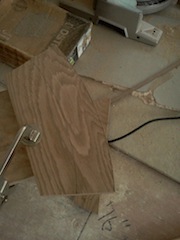

If, you can build one of these, you'll be able to build anything. You can add custom inlays to bring the design to another level. Unlock your abilities, you have more capabilities, then you know. G and S wood floors Lynn,Ma. Google+