Floating Hardwood Floors
Floating hardwood Floors -The term floating floor is used widely in the hardwood floor industry. But, It is not a flooring type, it is an installation method. When you hear this term, along with Pergo or laminate. Don't be confused because a lot of times, it is being referred to the installation method and not the type of flooring. For a real wood look, stability and more sustainable flooring product use engineered hardwood flooring. It can be site-finished or factory finished.
This article is not about how to install floating hardwood floors. This is about, how to prevent your floating hardwood floors from under performing and failing because of insufficient subfloor preparation, incorrect underlayment, poor installation, improper maintenance and care. What was expected to be a good cost saving investment can turn into a renovation headache. Continue reading to learn how you can take precautions and prevent these common floating hardwood floor installation mistakes from happening to you.
Floating Hardwood Floors - What you need to know
It is not a flooring
Yes, you know - It is an installation method. Then let's talk about the flooring. Make sure you choose the right type of flooring and have a good understanding of it. This will help you prepare the subfloor correctly to avoid hollow and high spots, choose the correct underlayment that is approved by the flooring manufacturer, adhesive, vapor barrier, installation method and maintenance. You will be saving yourself a lot of headaches and frustration.
Floating "hardwood" floors are available in engineered hardwood flooring, only. Remember, this article is about floating "hardwood" floors, not Pergo, laminates or luxury vinyl planks. Although, these flooring are installed the same way.
Engineered hardwood flooring are available in various thickness, from 5/16" to 3/4". Engineered hardwood flooring have great stability and can be installed as floating hardwood floors, in all the available thickness. It can be installed over concrete and wooden subfloors, along with radiant floor heat systems. It can be installed on any level of your home, including basements. The two general installation methods are click-lock or glued tongue and groove floating floor installation.
Floating hardwood floors - subfloor preparation
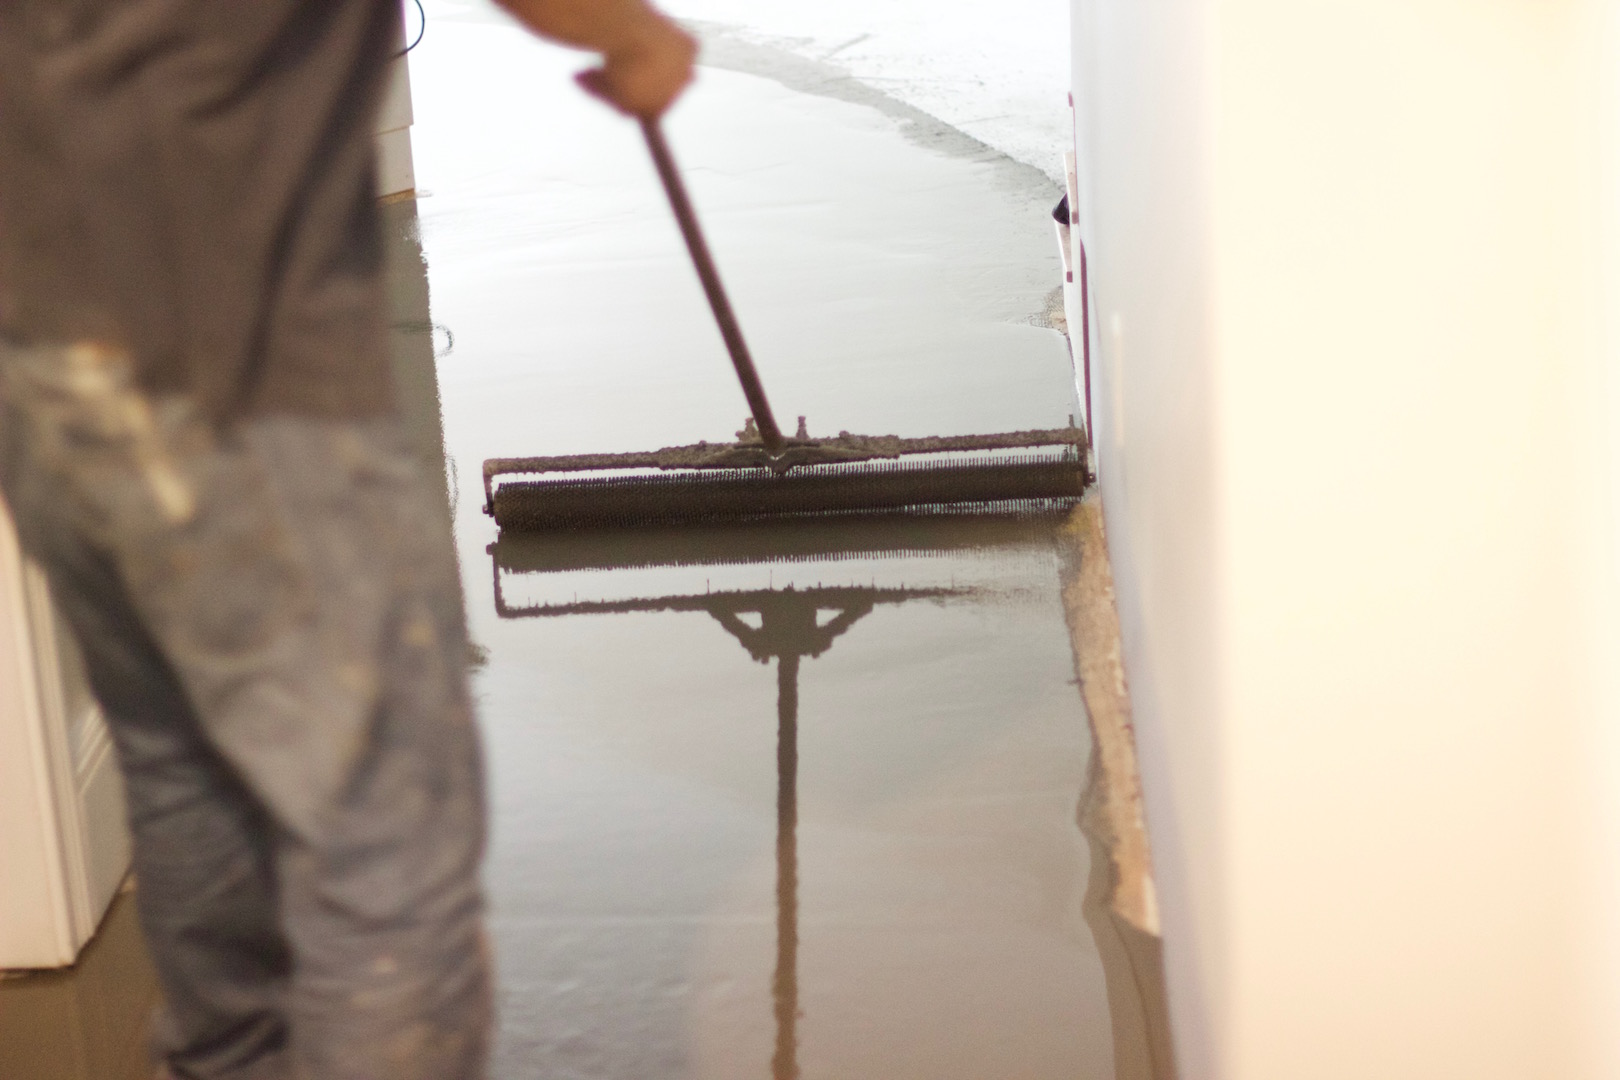 Preparing a concrete slab subfloor Preparing a concrete slab subfloor |
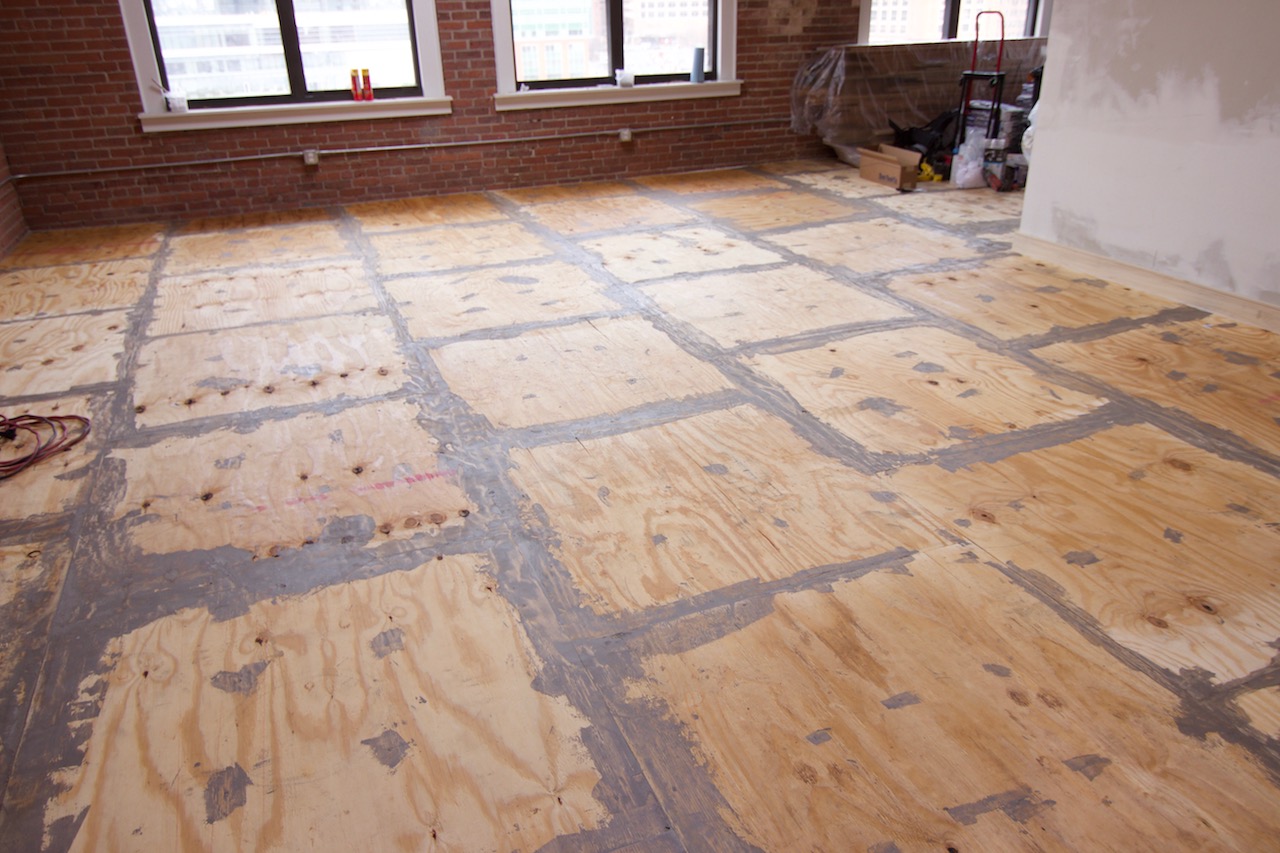 Preparing a wooden subfloor Preparing a wooden subfloor |
Preparation for floating hardwood floors is critical. If, one step is skipped or incorrectly performed. Repairing it can be a very big task. Which can involve removing your entire floating floor. Below is a checklist of general subfloor requirements. Always follow the flooring manufacture's requirements and guidelines to avoid, any possible voids of the manufactures warrantees.
- Flatness - A common mistake that most installers make is not preparing the subfloor properly. It takes more than just sweeping and vacuuming. To avoid a hollow spot and noisy floor, concrete and wooden subfloors need to be 3/16" flat over 10' span. Grind or sand down high spots and fill low spots with a Portland based cement compound.
- Dry - Moisture test your subfloor and make sure it meets the manufacturer's requirements. Any issues should be remediated prior to installation. Radiant floor heat systems should be pressure tested for any issues.
- Damaged subfloor - Cracks or damage subfloor panels should be repaired.
- Solid - The subfloor should be solid, any excessive deflections should be addressed. Loose concrete should be removed and repaired. Wooden subfloor should be fastened with non-corrosive deck screws screwed into the floor joist to eliminate deflection and squeaking.
Floating hardwood floors - underlayment
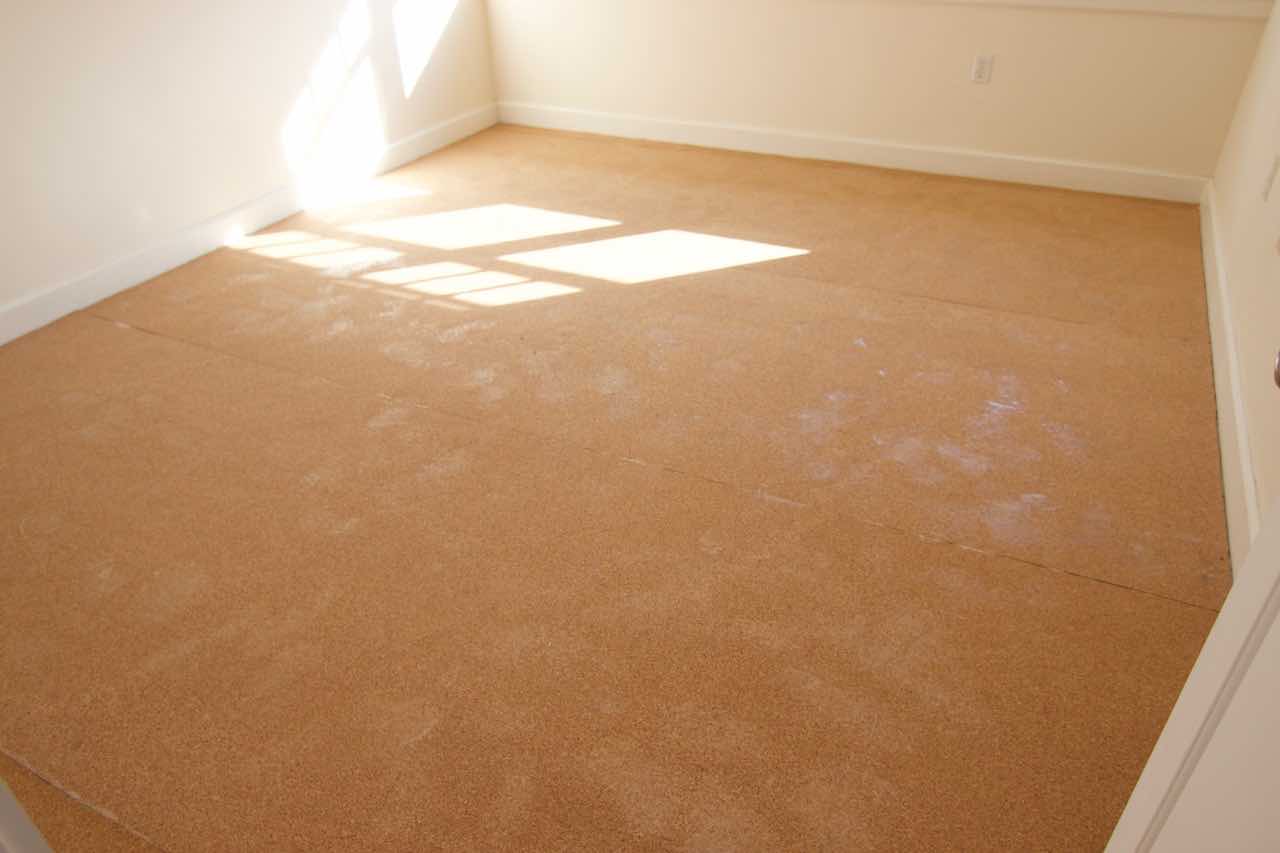 Floating hardwood floor - cork underlayment
Underlayments - Installers will get this one wrong a lot of times. Too often, the wrong type of underlayment is used for the wrong type of floor. When the wrong type of underlayment is used. You can end up with a noisy floor, due to too much movement. The underlayment flattens out overtime and does not provide the proper support needed. Moisture finds its way in because the underlayment was installed incorrectly or the wrong type was used. There are a lot of underlayments available be sure to choose the correct one for your floating hardwood floors. Below are information to help you select the right one.
- Check manufacturer's requirements - Is the very first thing you need to do. Don't just grab whatever is available, a lot of time it will be the incorrect type.
- Vapor barriers - The most common is 6 mil plastic. Avoid using black plastic instead use clear plastic. This will help you identify any moisture problems, if it occurs. Avoid puncturing the plastic and always have weather proofing tape like Tyvec weather proof tape on hand to repair tears. Overlap the edges by 6" or more and tape the seams with a durable weather proof tape.
- Underlayment - It doesn't matter which type of material you use, whether it's foam, felt, rubber or cork. It needs to meet the manufacturer's requirements for acoustical and stability - the maximum thickness and compression rate. Average thickness is 1/8" and compression rate is between 20-30%. The compression rate is the rate the product flattens over time. Make sure you have the proper rated underlayment to help your engineered floating floor perform correctly. For ease of installation, roll out the underlayment the same direction you are laying the floors. Do not overlap your edges, unless specified by the mfg.
Floating Hardwood Floors - installation
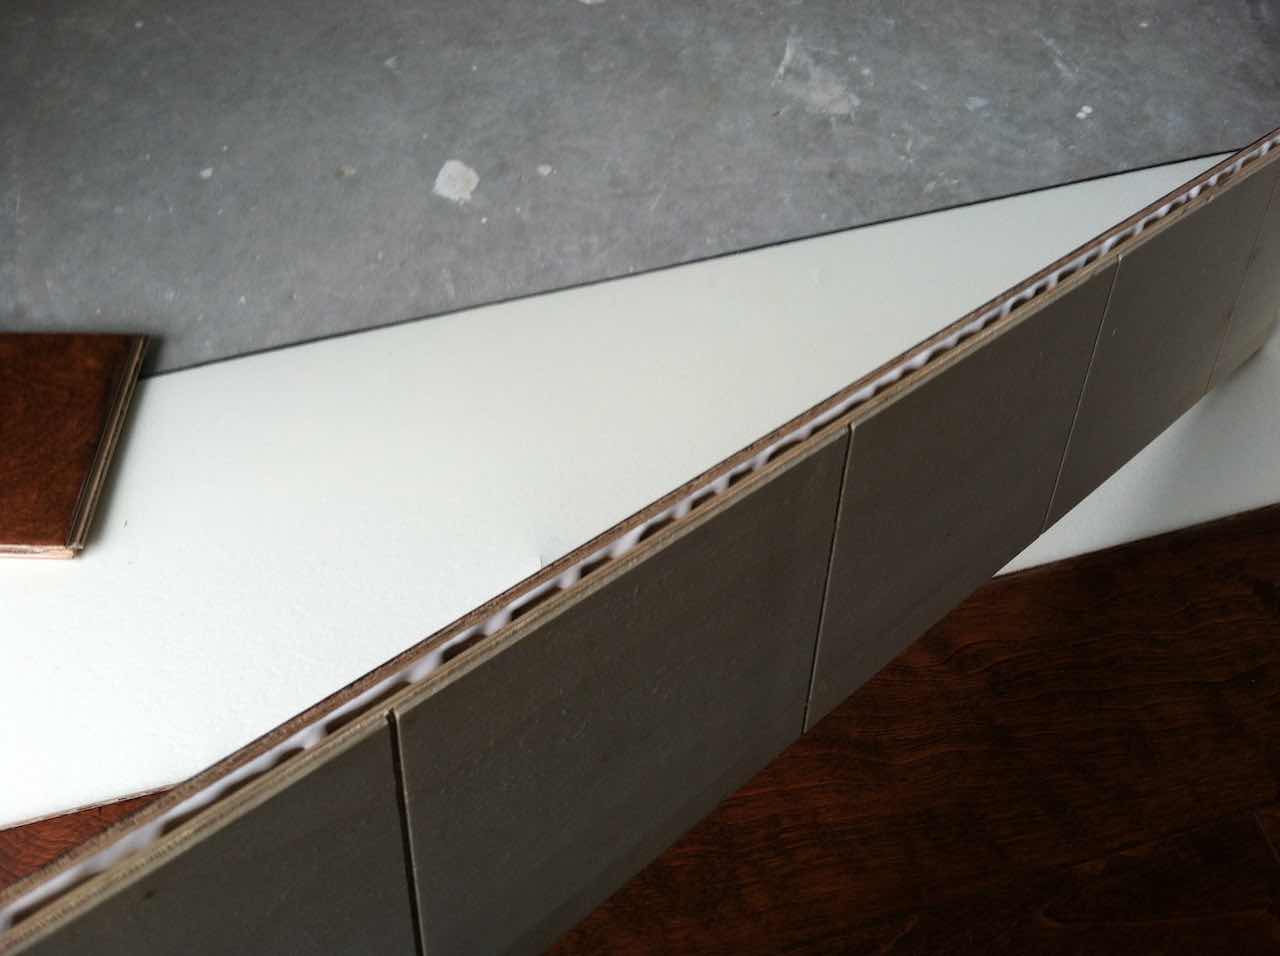 Floating hardwood floors using the glued tongue and groove method
There are two methods for installing floating hardwood floors. The most common method today is using a click-lock system. It is also, the most DIY friendly installation. Where boards inter-lock with each other with a snap. The second method is applying tongue and groove glue to the groove. The glue dries in 5 minutes and the boards are temporarily held together with painter's tape, while the glue dries. Although, it sounds simple. Below is a list of common mistakes made by installers.
- Acclimating - Engineered hardwood flooring is a wood product. It expands and contracts with humidity. Proper acclimating needs to be performed to minimize changes in the wood. Follow the manufacturer's guidelines for acclimating your wood floor. Generally, concrete subfloor cannot exceed 3 lbs psi of moisture, wooden subfloors cannot exceed 12% and hardwood flooring should be within 2-4% of moisture content.
- Use a tapping block - Use a tapping block to tap the boards in place. Any damages to the edges or tongue and groove will prevent the boards from locking.
- Adhesive - Use the correct type of adhesive. If, you have pre-finished engineered hardwood flooring. The glue can etch the finish, if, not cleaned off immediately. Also, apply a generous amount of adhesive to the groove side to make sure there is contact on both the tongue and groove. Not enough glue, equals separation, equalling gaps.
- Expansion gaps - So many floor installation buckles, because of insufficient expansion gaps. Use the correct size expansion gap. Expansion gaps plays a fundamental role in performance for floating hardwood floors. It allows the floor to change with humidity. The higher the humidity, the more expansion. There needs to be an expansion gap along all walls. The floors cannot be fixed in place. Expansion gaps should be equal to the thickness of your floor board, unless otherwise specified. Example 1/2" thick = 1/2" gap.
- Staggering - Not properly staggering the edges of the floor boards can lead to separation in the joints. Avoid step and H - patterns. Follow the mfg. for staggering board edges. NWFA recommends a minimum of 6" edge stagger. For wider boards, use a longer stagger for a more esthetic look.
- T-moldings - This one is easily overlooked. If, you are installing a large floating floor project. The manufacturer may require T - moldings installation at a certain length for additional expansion spaces. This can be at 30 or 40 feet width and lengths. The thicker the floor thickness, the longer the span. If, installing T-moldings in the middle of the house does not appeal to you. Purchase a thicker flooring product to avoid these toe bruisers.
- Dry wall - Another one that is overlooked. Sometimes the thickness of the flooring alone is not enough. On large projects, under cutting dry wall is needed for added expansion space, otherwise use thicker floor boards.
- Fix boards in place - Do not nail or glue flooring in place. This includes baseboards and moldings installations. Avoid nailing or gluing your floating hardwood floors in place. This will prevent it from changing with the humidity.
Floating Hardwood Floors - maintenance
Maintenance is solely the homeowners responsibility. There are plenty of cleaners available to clean your floors and help you maintain it. But for peak floating floor performance here are some things you need to do.
- Humidity - Maintain the humidity level throughout the year. Normal living condition is 30-50% RH. Check with the manufacturer for their specifications. A humidification system maybe required for your home.
- Sweep and vacuum regularly - Do not over use the hardwood floor cleaners. You can end up with residue build up. Sweeping and vacuuming is all you need.
- Floor mats - Use floor mats at entrances, high traffic areas and in kitchens. This will help cut down on dirt, sand and debris from wearing your finish away.
- Pets - Trim their nails to prevent scratching.
Avoid installation mistakes and save yourself from frustrations. Follow the information above and you will have a long lasting performance from your floating floors.
For more information on floating hardwood floors visit NWFA.org
Choose an ideal company
You have done all the research and now have the knowledge. Don't choose the wrong flooring company.
Why work with average, when you can work with an ideal hardwood flooring company? Avoid opting for sub-par products, poor workmanship, the lack of industry knowledge and training for the sake of something new.
With G & S Floors, you will experience optimum personal service, with superlative, effective premium quality workmanship in the industry and high quality products. Homes are one of the biggest and most important investments and should be cared by an ideal company.
We've been in business over 19 years. We are a NWFA flooring contractor and follow industry standards and best practice for hardwood flooring installation, sand and finishing. We have access to training and ongoing professional development. We have a well trained staff and we never stop learning. We have a powerful network of talented professionals, distributors, manufactures and experts.
Invest in "Quality" for better service and hardwood flooring that can last a lifetime or centuries!
