If the redirect does not work, please click the following link:
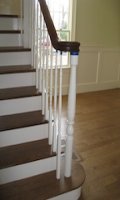
Stair treads
Back to top of page
Read about us at www.HomeTipsWorld.com
Installation Staircase Winders Wood Finishes
Copyright © 2011 - 2015. All rights reserved. GandSwoodfloors.com