Wood Floor Finishes Waterbase
 Wood floor finishes waterbase
Wood floor finishes waterbase Polyurethane - The character of a Waterbase wood floor finishes are similar to oil base. Being a latex finish, clean up is easy, just use warm water. Water base floor finishes are very different from each other. You get what you paid for, with this type of wood floor finish. The lower end finishes will fade in color as it ages. They don't hold up to well and can easily be damaged by the sun's ray. Not only that you'll have to apply from 4 to 5 coats. I'd rather go fishing than be tied up with work all day long.
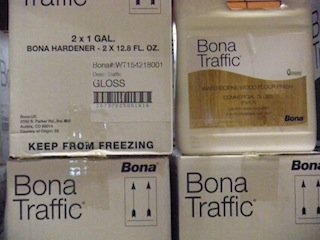
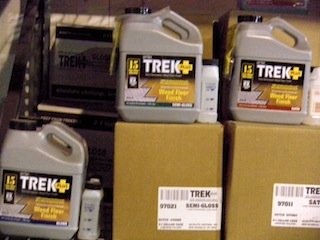
If, you decide to use a latex finish. I recommend using either Loba Supra AT, Trek plus or Bona Traffic HD. In This article, I will be covering the Trek plus finish. So, let's get started.
Trek plus finish consist of a sealer coat (sealer xl) and the 2 part Trek plus finish(hardener and finish). Make sure your using applicators specified for latex paints only. We'll begin with the sealer coat.
Wood floor finishes waterbase: Applying sealer
 Wood floor finishes waterbase: Trek Plus
Wood floor finishes waterbase Sealer XL - Using a 4" latex full synthetic angled sash brush, start by applying the sealer along the edges, coating lengthwise with the floor boards. Then coat 2-4 feet on the width, cover 6-8 inches of edges. If your a beginner, i suggest coating smaller widths, around 2 feet, should be good or an area where you can complete within 5 minutes.
Wood floor finishes waterbase tip: Do not play with the wood floor finish. The more friction you apply the faster the finish will set-up. Try and apply the proper coverage within 2 passes. First pass: apply a generous coat across the grain. Second pass: chase the grain by brushing along the grain.
Now, pour a 4-6 inch puddle along the length of the floor.
Example: wall is 12 feet, length of puddle should be about 10 feet by 2-4 inch wide. Pre-damp a 10" latex block applicator or a T-bar applicator with sealer, pre-coat the floor quickly. Now for the finish pass, beginning at one end of the room. Using a plowing motion (snow plow), working with the grain of the wood flooring. Drag the mop towards other end, with the mop slightly angled like a plow. This angle will direct any extra finish towards you.
Once you've reached the opposite side of the room. Work back to opposite side, directing the finish away from your starting wall. Always, check for missed spots, splashes and puddles, before continuing with your coating, re-coat if necessary. Keep in mind you only have a 15 minute working time, once the finish is poured out of it's container. So there is no stop at this point. Brush out any bubbles, foam, or ridges from the wood floor finishes.
Repeat procedure until wood flooring is coated with sealer xl. Allow 2 or more hours to dry. If, the finish looks spotty or uneven. If, it has been less than 24 hours of drying. Abrading the finish is not needed for adhesion. For the smoothest finish, abrading is recommended.
- Buff or screen - wood flooring using a combination of white cleaning pad, maroon buffing pad, and 2 strips of stick-on 220 grit sandpaper. Replace sanding strips, if needed. Clean and tack surface.
- Apply a second coat of sealer xl. This will prevent any tanning pull in the wood , which is common with white oak hardwood flooring. This will also provide you with a high film build finishing system. Allow the sealer to dry overnight before continuing.
Wood floor finishes waterbase: storage
Wood floor finishes waterbase
Storage-Rinse and clean both applicators in warm water. Then keep soaked in clean water, until the next use. Dry off before next use. Any unused sealer xl can be stored away, read label for shelf life.
Buff or screen - wood flooring using a combination of white cleaning pad, maroon buffing pad, and 2 strips of stick-on 220 grit ceramic sanding strips. Clean and tack surface.
Wood floor finishes waterbase: Applying topcoat
Trek plus - Combine the hardener and wood floor finishes together, in the trek plus bottle. Shake vigorously and let sit for 5 minutes, before using.
Wood floor finishes waterbase: Trek plus finish has a shelf life of 6 hrs when you combine both parts together. It turns into thick jello, becoming unusable.
Example: 1 gallon covers 500 sq. ft., if you're coating a room that's 250 sq. ft. You should pour half the container into a clean empty water gallon or container that you can use for pouring. Combine the amounts of the 2 parts, for what your coating for now. Mix the remainder when you're ready to use it. Once you have combined the 2 parts, you actually only have about 4 hrs to apply the product, before it becomes unusable. So, it's wise to use only what you need. This wood floor finish is expensive, do this with any type of finish where you must combine with another part, such as a hardener or catalyzer.
Using a 4" latex synthetic angled sash brush, pour a 2-4 inch round puddle, start by applying the wood floor finishes along the edges, coating lengthwise with the floor boards. Then coat 2-4 feet on the width, cover 6-8 inches of edges. If you're a beginner, I suggest coating smaller widths, around 2 feet, should be good or an area where you can complete in 15 minutes.
wood floor finishes waterbase Tip: Do not play with the finish. The more friction you apply the faster the finish will set-up. Try and apply the proper coverage within 2 passes.
Now, pour a 2-4 inch puddle along the length of the floor. Example: wall is 12 feet, length of puddle should be about 10 feet by 2-4 inch wide. Pre-damp a 10" latex block applicator or T-bar applicator with Trek plus finish, pre-coat the floor quickly. Now for the finish pass, beginning at one end of the room. Using a plowing motion (snow plow), working with the grain of the wood flooring. Drag the mop towards other end, with the mop slightly angled like a plow. This angle will direct any extra finish towards you.
Once you've reached the other side of the room. Work back to opposite side, directing the finish away from your starting wall. Always, check for missed spots, splashes and puddles, before continuing with your coating, re-coat if necessary. Keep in mind you only have a 15 minute working time, once the finish is poured out of it's container. So there is no stop at this point. Brush out any bubbles, foam, or ridges from the wood floor finishes.
Repeat procedure until wood flooring is coated with Trek plus. Allow 2 or more hours to dry. Buff or screen wood flooring using a combination of white cleaning pad, maroon buffing pad, and 2 strips of stick-on 220 grit sandpaper. Clean and tack surface. Apply a second coat of Trek plus. Allow to dry overnight.
wood floor finishes waterbase Storage-Rinse and clean both applicators in warm water. Then keep soaked in clean water, until the next use. Any uncombined Trek plus finish can be stored away, read label for shelf life.
For more information on wood floor finishes waterbase visit NWFA.org
Choose an ideal company
You have done all the research and now have the knowledge. Don't choose the wrong flooring company.
Why work with average, when you can work with an ideal hardwood flooring company? Avoid opting for sub-par products, poor workmanship, the lack of industry knowledge and training for the sake of something new.
With G & S Floors, you will experience optimum personal service, with superlative, effective premium quality workmanship in the industry and high quality products. Homes are one of the biggest and most important investments and should be cared by an ideal company.
We've been in business over 19 years. We are a NWFA flooring contractor and follow industry standards and best practice for hardwood flooring installation, sand and finishing. We have access to training and ongoing professional development. We have a well trained staff and we never stop learning. We have a powerful network of talented professionals, distributors, manufactures and experts.
Invest in "Quality" for better service and hardwood flooring that can last a lifetime or centuries!

